Shape Properties and Settings
Each shape that is created or imported appears on a separate line in the top section of the Data Properties and Settings panel. You can control the visibility of a shape within a view with the icons available in the top section of the panel, as well as access settings in the lower section to apply effects to selected visuals. A pop-up menu is available for exporting shapes in the .ORSObject file format (see Exporting Objects).
Shape properties and settings
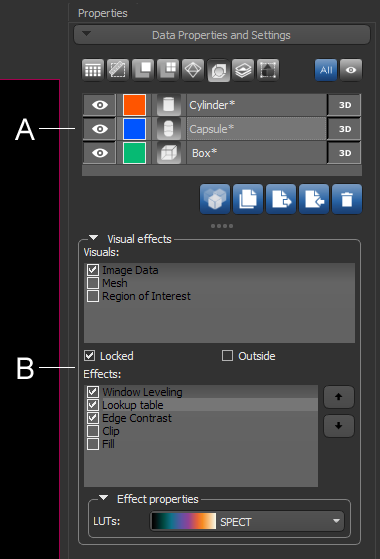
A. List of shapes B. Basic properties C. Visual effects
All shapes that can be added to scene views are listed in the top section of the Data Properties and Settings panel.
- Click the Shapes
 icon at the top of the panel to see the available shapes (see Filters for information about filtering the listed items).
 - Click the Eye icon on the left side of the listed item to show or hide the shape in the current scene. Click the 3D icon on the right side of the listed item to show or hide the shape in the 3D view of the current scene. See Object List for more information about changing visibility.
- Click the color box to change the color of the lines that define a shape.
- Select a shape to access settings to modify its properties.
- Right-click a shape to access export functions (see Exporting Objects).
The information available for the selected shape includes its geometry, size, and data type. A large thumbnail is also available for reference.
|
|
Description |
|---|---|
|
Width |
Indicates the total number of pixels along the X-axis and its physical dimension*. |
|
Height |
Indicates the total number of pixels along the Y-axis and its physical dimension*. |
|
Radius |
Pending*. |
|
Surface |
Pending. |
| Volume | Indicates the total volume occupied by the dataset. |
* Calculated as pixels*spacing.
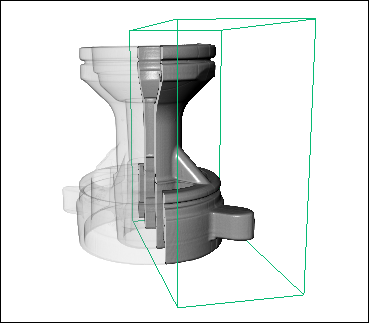
The Visual effects box contains a list of all the available objects — image data, regions of interest, multi-ROIs, and meshes — to which selected shape effects can be applied. For a selected effect, the Effects properties box displays the properties based on the nature of the effect and includes controls, such as sliders, menus, and color swatches, that you can use to change its properties. You should note that it is possible to apply shape effects to multiple objects and to corresponding data that is either inside or outside of the shape (see Applying Visual Effects to Clips and Shapes). You should also note that multiple effects can be applied simultaneously.
Edge contrast effect applied outside a box